


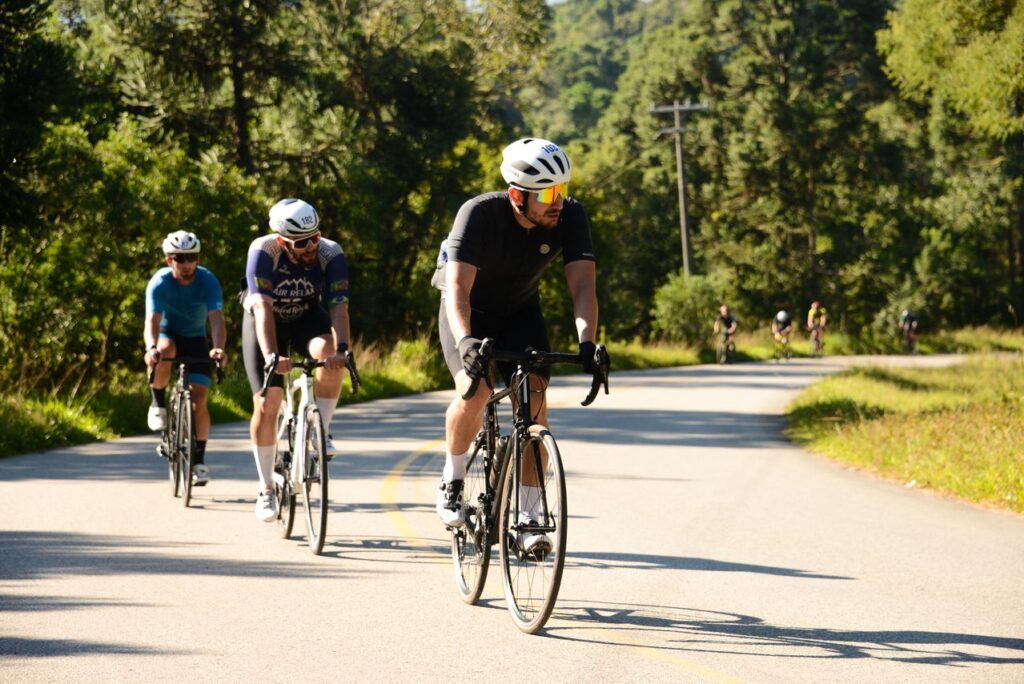
Cycling is one of the best ways to explore Metro Vancouver.
You can ride along the waterfront, commute to work or school, connect with SkyTrain, explore regional trails, run errands without a car, or take the family out for a weekend ride.
But getting started involves more than buying a bicycle.
What type of bike should you get? Is it better to buy or rent? How do you take a bike on transit? Where can you park it safely? What equipment do you actually need? And where should you ride once you have a bike?
This guide covers the practical side of cycling in Metro Vancouver — from choosing and buying your first bike to renting, transporting, storing, maintaining and riding it.
Why Cycle in Metro Vancouver?
Cycling can be practical transportation, exercise, recreation, or all three.
For some people, a bicycle replaces short car trips. For others, it is simply a way to spend an afternoon outside.
Metro Vancouver also makes it relatively easy to combine cycling with other forms of transportation. You can ride to a SkyTrain station, park your bike and continue by transit, or take your bike with you when transit rules and capacity allow.
Vancouver also has an expanding network of protected bike lanes, local bikeways and greenways. The City publishes both an interactive cycling map and a 2026 printed cycling map for planning rides.
The best part is that you don’t need an expensive bicycle or years of experience to get started.
Choosing the Right Bike
There isn’t one “best” bike.
The right bicycle depends on where you plan to ride, how far you normally travel, whether you need to carry anything, and where you will store it.
A quick guide
Mainly neighbourhood streets and bike paths:
A hybrid or commuter bike is a good starting point.
Regular commuting:
A hybrid, commuter, road bike or e-bike can work depending on distance and terrain.
Long distances and speed:
Consider a road bike.
Hills or longer commutes:
An e-bike can make riding much easier.
Carrying children or groceries:
Consider a cargo or family bike.
Small condo or frequent transit use:
A folding bike can be particularly practical.
Paved roads plus gravel and rougher surfaces:
A gravel or mountain bike may be more appropriate.
If you’re buying your first bike and aren’t sure what you need, a good-quality hybrid is often the simplest all-purpose choice.
Before You Buy a Bike
Before choosing a particular model, think about how the bike will actually fit into your life.
Ask yourself:
- Where will I store it?
- Will I have to carry it up stairs?
- How far will I normally ride?
- Will I ride in the rain?
- Will I take it on transit?
- Do I need to carry groceries or children?
- Do I need a rack and panniers?
- Do I need fenders?
- Do I regularly ride hills?
- Will I need to charge an e-bike battery?
- Does my building have rules about bike or e-bike storage?
A slightly more expensive bike that fits your needs can be a much better purchase than a cheap bike that ends up sitting unused.
Buying a Bike in Metro Vancouver
You have three main choices: buy new, buy used, or buy from a community bike organization.
New Bikes: Decathlon and Local Bike Shops
Decathlon is one option for people looking for relatively affordable new bikes. Its lineup includes hybrid, road, mountain, kids’ and electric bikes.
The Riverside hybrid range is particularly relevant for everyday riding and commuting.
Prices and models change, so check the current lineup before buying rather than relying on an old price quoted in an article.
For a more personalized buying experience, independent bike shops can provide:
- Bike sizing and fitting
- Advice about different components
- Repairs and servicing
- Accessories
- Commuter and touring setups
- E-bike advice
- Help choosing a bike for your particular type of riding
Metro Vancouver has many independent shops, including Reckless Bike Stores, MyBikeShop, Steed Cycles, Dream Cycle and other local retailers.
The advantage of a local bike shop isn’t necessarily that every bike will be better. It’s the ability to get advice, fitting and ongoing service from people who work with cyclists every day.
Getting the Right Bike Size
Bike fit matters.
Don’t choose a bike solely because the frame size sounds right for your height. Manufacturers use different sizing systems, and your riding position also depends on the frame design.
A bike shop can help adjust:
- Frame size
- Saddle height
- Saddle position
- Handlebar position
- Reach
- Brake-lever position
A correctly fitted bike should feel comfortable and controlled rather than forcing you into an awkward position.
Used and Community Bikes
Buying used can be a good way to get into cycling for less money.
Common second-hand sources include online marketplaces and community bike organizations.
When buying a used bike, check:
- Frame for cracks or serious damage
- Wheels for bends
- Tires for excessive wear
- Brakes
- Gears and shifting
- Chain and drivetrain
- Bearings and unusual noises
- Serial number and ownership information
If you’re not confident inspecting a bike yourself, consider taking it to a bike shop before buying.
Community organizations can be another option. Our Community Bikes and UBC’s Bike Kitchen are examples of places where cyclists can learn about bike repair and maintenance.
How Much Does It Cost to Start Cycling?
You don’t need to spend thousands of dollars.
A basic setup might consist of:
Budget setup
- Used or inexpensive bike
- Helmet
- Lock
- Front and rear lights
Everyday commuter setup
- Hybrid or commuter bike
- Helmet
- Quality lock
- Lights
- Fenders
- Rack
- Panniers or another way to carry belongings
E-bike setup
- E-bike
- Helmet
- High-quality lock
- Lights
- Fenders
- Rack or cargo system
- Appropriate charging and storage space
The bicycle is often only part of the cost. Accessories can add up quickly, so include them in your budget.
What to Buy With Your Bike
At minimum, most cyclists should have:
- Helmet
- Lock
- Front light
- Rear light or reflector
- Pump
- Water bottle
For regular riding, consider:
- Spare tube
- Tire levers
- Mini pump
- Multi-tool
- Fenders
- Rack
- Panniers
- Bell
- Rain gear
If you commute, panniers can be especially useful because you don’t have to carry everything on your back.
Renting a Bike in Metro Vancouver
You don’t need to own a bicycle to enjoy cycling.
Renting makes sense if you’re:
- Visiting Vancouver
- Trying cycling for the first time
- Only cycling occasionally
- Planning a one-day ride
- Looking for a specialty bike
- Cycling with a family
Mobi by Rogers
Mobi is Vancouver’s public bike-share system.
It’s particularly useful for short urban trips where you don’t want to worry about owning, maintaining or storing a bicycle.
Bike share can work well for:
- Downtown trips
- Short commutes
- Exploring Vancouver
- One-way journeys
- Combining cycling with transit
Mobi’s pricing and membership options change, so check the current rates before purchasing a pass.
For someone who is only visiting or experimenting with bike share, a short-term pass can be a good way to see whether it fits your needs.
Lime
Lime provides shared micromobility services in participating Metro Vancouver communities, including e-bikes and e-scooters where available.
Service areas and prices can change, so check the app before starting a trip.
Traditional Rental Shops
For longer rides and families, traditional rental shops can be more practical than bike share.
They can offer:
- Children’s bikes
- Child trailers
- Tandems
- Cargo bikes
- E-bikes
- Longer rental periods
The Denman Street area near Stanley Park has historically been one of Vancouver’s main rental-bike areas.
You can also browse local bike-rental providers on Active Vancouver:
Browse bike rentals across Metro Vancouver
Transporting Your Bike
One of the biggest advantages of cycling in Metro Vancouver is that your bike doesn’t always have to be the entire journey.
You can combine it with cars, SkyTrain, buses, SeaBus and other transit services.
By Car
If you own a car, a bike rack can make it much easier to reach cycling destinations outside your neighbourhood.
Depending on the vehicle, you can use:
- Roof racks
- Hitch-mounted racks
- Trunk-mounted racks
If you don’t own a car, car sharing can also make bike trips to more distant trailheads possible.
Evo
Evo vehicles are equipped with roof-mounted bike racks, making them useful for combining car travel with cycling.
This can be particularly convenient when you want to ride somewhere that isn’t practical to reach entirely by bicycle.
Always check the current Evo rules and vehicle availability before relying on a bike rack.
Taking Your Bike on TransLink
TransLink allows bicycles, e-bikes and folding bikes on buses, SkyTrain, SeaBus and West Coast Express, subject to service-specific rules, capacity and restrictions. Bikes must remain under the rider’s control and cannot block aisles or interfere with other passengers.
Rules can change, so check TransLink before an important trip.
Buses
Buses have front-mounted bike racks with limited capacity.
If the racks are full, you may have to wait for another bus.
SkyTrain
Regular bikes are allowed on SkyTrain, but capacity and time restrictions apply on some lines.
Don’t assume that every train will have room for a bicycle, particularly during busy periods.
SeaBus and West Coast Express
Bikes are permitted, subject to capacity and service rules.
Folding Bikes
Folding bikes can be especially useful for combining cycling with transit because they can be folded and stored as permitted by TransLink’s rules.
Special Events
Temporary restrictions can be introduced during major events.
For example, TransLink introduced special bike, e-bike and scooter restrictions around Vancouver FIFA World Cup 2026 match periods.
Always check before travelling to a major event.
Bike + Transit: The Best of Both Worlds
Cycling doesn’t have to replace transit.
For many Metro Vancouver trips, the most practical option is:
Bike → transit → bike
For example, you might:
- Ride from home to a SkyTrain station.
- Park your bike securely.
- Take SkyTrain to another part of the region.
- Continue by bike.
This can make much longer regional journeys practical without a car.
TransLink specifically promotes cycling as a way to get to and from transit hubs.
Parking Your Bike
There are several ways to park a bike in Metro Vancouver.
TransLink Bike Parkades
TransLink operates secure Bike Parkades at 11 SkyTrain stations, including Bridgeport, Burquitlam, Commercial–Broadway, Joyce–Collingwood, King Edward, King George, Lafarge Lake–Douglas, Main Street–Science World, Metrotown, Port Coquitlam and Maple Meadows.
Current Bike Parkade pricing is $1 per day, up to $8 per month.
Access requires a registered Compass Card and enrollment in the Bike Parkade program. Parkades are monitored by CCTV and have 24/7 access.
They are intended for day use rather than long-term storage. Bikes left for more than four days can be treated as abandoned and removed.
TransLink also offers bike lockers at many stations and some bus exchanges.
Street Bike Parking
The City of Vancouver provides bike racks throughout the city.
When parking outdoors:
- Use a secure fixed rack.
- Lock the frame, not only the wheel.
- Choose a visible location.
- Avoid leaving expensive bikes outside overnight.
- Remove easily detachable accessories.
Preventing Bike Theft
Bike theft is an unfortunate reality of urban cycling.
A few habits can reduce the risk.
Use a Good Lock
A quality U-lock is a good primary choice.
For a more expensive bike, consider a higher-security lock or a second lock.
Avoid relying on a thin cable lock as your only security for an expensive bicycle.
Lock the Frame
Lock the frame to a secure bike rack whenever possible.
Don’t lock only the front wheel.
Register Your Bike
The City of Vancouver recommends registering bicycles with 529 Garage and learning proper locking techniques.
Keep a record of:
- Serial number
- Photos
- Make and model
- Receipts
- Distinctive features
Store this information somewhere other than on the bike itself.
Storing a Bike in a Condo or Apartment
Storage is one of the biggest practical challenges for Vancouver cyclists.
Think about storage before buying the bike.
Building Bike Rooms
Many newer buildings have dedicated bike rooms.
Check with your strata or property manager about:
- Access
- Storage rules
- Waitlists
- Bike lockers
- Charging rules for e-bikes
Even inside a secure bike room, lock your bike if the building’s rules allow it.
In-Suite Storage
If you need to keep the bike inside your home, options include:
- Wall-mounted vertical racks
- Floor-to-ceiling tension systems
- Freestanding vertical stands
- Folding bikes
A vertical setup can dramatically reduce the amount of floor space required.
Garages and Sheds
For houses and townhomes, a garage or secure shed is ideal.
If you store a bicycle outdoors, keep it protected from rain and humidity and use a secure lock.
Types of Bikes
Hybrid / Commuter Bike
The all-rounder.
Good for:
- Commuting
- Bike paths
- Neighbourhood riding
- Recreational rides
- Light gravel
Look for mounts for racks and fenders if you plan to commute.
Road Bike
Designed for speed and longer paved rides.
Typical characteristics include:
- Drop handlebars
- Narrower tires
- Lightweight frames
- Riding position optimized for distance and speed
Mountain Bike
Designed for off-road trails.
Mountain bikes generally have wider tires and suspension designed for rough terrain.
A mountain bike can be overkill if you mainly ride paved city routes.
E-Bike
Useful for:
- Hills
- Longer commutes
- Carrying loads
- Riders who want assistance
- Making cycling accessible to a wider range of riders
Cargo and Family Bike
Designed to carry children, groceries or other loads.
Cargo bikes can be a practical alternative to some short car trips, particularly for families.
Folding Bike
Useful for:
- Small apartments
- Transit combinations
- Car trunks
- Riders with limited storage
Gravel Bike
A middle ground between road cycling and rougher surfaces.
Gravel bikes can be useful if your rides mix pavement with packed gravel and maintained trails.
Kids’ Bikes
Children’s bikes come in many sizes.
When choosing one, prioritize correct fit, manageable weight and the child’s ability to control the bike rather than buying a bike that is excessively large so they can “grow into it.”
E-Bikes in British Columbia
B.C. has specific legal definitions for light and standard e-bikes.
A light e-bike has a motor output of no more than 250W, cannot propel the bike beyond 25 km/h, requires the rider to pedal or hand-crank, and cannot have an accelerator controller.
A standard e-bike can have motor output up to 500W and assistance up to 32 km/h, subject to the regulation’s requirements.
There are also minimum-age rules:
- Light e-bike: minimum age 14
- Standard e-bike: minimum age 16
If you’re buying an e-bike, don’t look only at the advertised motor power. Make sure the particular model meets the applicable B.C. definition.
Also consider practical questions:
- How heavy is the bike?
- Can the battery be removed?
- Where will you charge it?
- Does your building allow battery charging?
- Can you safely carry the bike upstairs?
- Is it compatible with your car rack?
- Are there restrictions on your intended trails or facilities?
Basic Bike Maintenance
You don’t have to become a bicycle mechanic, but learning a few basics can save money and prevent problems.
Before a longer ride, check:
- Tire pressure
- Brakes
- Chain
- Gears
- Wheels
- Lights
- Quick releases or other major fasteners
Keep the chain clean and lubricated.
In Metro Vancouver’s wet climate, regular cleaning and lubrication can help prevent unnecessary drivetrain wear.
Learn how to repair a flat tire before going on a long ride.
Local cycling programs also teach basic maintenance skills, including changing a flat, checking brakes and gears, and cleaning a chain.
For more serious repairs, take the bike to a qualified bike shop.
What to Carry on a Bike Ride
For a short ride, you may only need a phone, water and a lock.
For longer rides, consider carrying:
- Water
- Phone
- Lock
- Spare tube
- Tire levers
- Mini pump
- Multi-tool
- Snacks
- Rain jacket
- Small first-aid supplies
You don’t need a huge backpack.
A rack with panniers can make longer rides much more comfortable.
Cycling Safety in Metro Vancouver
Cycling is safest when you are predictable, visible and aware of your surroundings.
Wear a Helmet
B.C. requires cyclists to wear an approved bicycle helmet.
Be Visible
The City of Vancouver recommends a white headlight and rear red light/reflector after dark, and specifically emphasizes visibility in fog and rain.
Don’t assume that street lighting makes you visible enough to drivers.
Watch Intersections
Pay particular attention when:
- Turning across traffic
- Approaching driveways
- Passing parked vehicles
- Crossing intersections
- Riding beside turning vehicles
Watch for Car Doors
A parked vehicle can hide a person about to open a door.
Give parked cars enough space whenever possible.
Use Your Bell
A bell or audible warning can help pedestrians and other cyclists know you’re approaching.
Cycling Etiquette
Bike paths and protected lanes are shared spaces.
Remember to:
- Keep right when appropriate.
- Pass carefully.
- Give slower riders space.
- Use a bell or verbal warning before passing.
- Slow down around children.
- Don’t stop in the middle of a busy cycling route.
- Give pedestrians enough room.
- Follow signs and local rules.
A good cycling route should feel comfortable for beginners as well as experienced riders.
Cycling in the Rain
Rain doesn’t have to stop you from cycling.
For regular Vancouver riding, some of the best upgrades are surprisingly simple:
Fenders
Full-length fenders keep water and road spray off you and your bike.
Good Lights
Use lights when visibility is poor, not just when it is completely dark.
Waterproof Bags
Panniers or waterproof bags can keep clothes, electronics and groceries dry.
Clothing
A waterproof jacket and appropriate layers can make wet-weather cycling much more comfortable.
Take It Easier
Wet roads can reduce traction and increase stopping distances.
Be especially careful around:
- Painted road markings
- Metal surfaces
- Wet leaves
- Tracks and other slippery surfaces
The City of Vancouver specifically advises cyclists to stay visible in dark and wet conditions.
Cycling With Kids
Cycling can be a great family activity.
Depending on age and ability, families can use:
- Balance bikes
- Kids’ bicycles
- Child seats
- Trailers
- Tag-alongs
- Cargo bikes
For family rides, don’t choose a route based only on distance.
Look for:
- Separated cycling paths
- Low-traffic streets
- Places to stop
- Washrooms
- Playgrounds
- Food nearby
- Easy access to transit
The best family ride isn’t necessarily the longest one. It is the one where everyone finishes wanting to ride again.
How to Plan a Cycling Route
Distance isn’t the only thing that matters.
A 15-km ride on a comfortable separated route can feel much easier than a 10-km route beside heavy traffic.
Before leaving, check:
- Distance
- Elevation
- Protected/separated bike lanes
- Traffic
- Surface type
- Hills
- Construction
- Weather
- Bike parking
- Food and washrooms
- Transit connections
The City of Vancouver’s interactive cycling map shows bikeways, greenways and leisure routes, and its 2026 cycling map is available as a downloadable PDF and printed map.
TransLink also provides regional cycling information for trips beyond Vancouver.
Where to Ride in Metro Vancouver
There is much more to Metro Vancouver cycling than the Stanley Park Seawall.
Instead of looking only for the “best” trail, choose a route based on what kind of ride you want.
Best for Beginners
Stanley Park Seawall
One of Vancouver’s most recognizable cycling destinations.
The park provides spectacular views and a relatively straightforward paved cycling experience.
Check current park signage and route directions because cycling and pedestrian circulation differs around the seawall.
Central Park, Burnaby
A short loop that works well when you want a relatively short recreational ride rather than an all-day adventure.
Longer Recreational Rides
Traboulay PoCo Trail
A large loop around Port Coquitlam with paved and gravel sections, riverfront scenery, wetlands and forest.
Boundary Bay Dyke
A flat shoreline route with wide-open views and excellent birdwatching opportunities.
Check conditions before riding because parts of the route are exposed to weather.
Scenic Rides
Iona Beach Regional Park
The jetty provides a flat out-and-back ride with expansive views across the Strait of Georgia.
It is also a great place to combine cycling with watching aircraft around YVR.
Stanley Park and the Waterfront
For visitors, this is one of the easiest ways to combine cycling with Vancouver’s major scenery and attractions.
Urban Cycling Corridors
Arbutus Greenway
The Arbutus Greenway provides a major north-south cycling and walking corridor through Vancouver.
It is useful both as a destination and as a way to connect different neighbourhoods.
Central Valley Greenway
A regional cycling corridor connecting communities across Vancouver, Burnaby and New Westminster.
BC Parkway
Another important regional cycling corridor connecting Vancouver with Burnaby, New Westminster and Surrey.
These routes are particularly useful if you’re interested in getting somewhere by bicycle, rather than simply going for a recreational ride.
Bike Rides With a Destination
You don’t always need to ride just for the sake of riding.
Some of the most enjoyable cycling trips have a destination at the end.
Try planning rides around:
- Beaches
- Parks
- Playgrounds
- Cafés
- Restaurants
- Farmers markets
- Swimming pools
- Attractions
- Viewpoints
- Community events
This is where cycling becomes part of a bigger Metro Vancouver day out.
On Active Vancouver, look for ways to combine a cycling route with an activity or destination:
Bike + Beach
Bike + Food
Bike + Kids
Bike + Park
Bike + Event
Bike + Transit
Planning Your First Ride
If you’re new to cycling, don’t start with a huge distance.
Try this:
1. Choose an easy route
Start with a protected or low-traffic route.
2. Check the distance
Choose something comfortably within your current ability.
3. Check the weather
Especially in Vancouver, weather can change the experience considerably.
4. Check your bike
Inflate the tires and test the brakes.
5. Bring the basics
Take water, a lock and a phone. For longer rides, bring a repair kit.
6. Know where you’re going
Download or save your route before leaving.
7. Have a backup plan
Know where you can stop or connect to transit if you get tired or the weather changes.
8. Increase the distance gradually
Once a route feels easy, explore farther.
Cycling Doesn’t Have to Be Complicated
You don’t need a $5,000 bicycle, specialized clothing or years of experience to start cycling in Metro Vancouver.
You can:
- Rent a bike for an afternoon.
- Try Mobi.
- Buy an inexpensive hybrid.
- Ride around your neighbourhood.
- Take your bike on transit.
- Park it at a Bike Parkade.
- Explore a local greenway.
- Take the family to a park.
- Ride to the beach.
- Use a bike instead of a car for a short trip.
Start with the kind of cycling that fits your life.
Then explore from there.
Find More Cycling Activities in Metro Vancouver
Active Vancouver helps you discover activities, places, events, rentals and outdoor experiences across Metro Vancouver.
Browse bike rentals and outdoor providers on ActiveVancouver.ca
More cycling guides coming soon:
- Best Bike Routes in Metro Vancouver
- Best Family Bike Rides
- Cycling With Kids
- E-Bikes in Vancouver
- Bike + SkyTrain: How to Combine Cycling and Transit
- Cycling in Vancouver in the Rain
- How to Prevent Bike Theft
- Where to Repair Your Bike in Metro Vancouver